
Gold Watch Case Design and Manufacturing
Our initial plan for this watch was just to rehouse the movement into a newly made gold case. However, not only did we want to give it a new case, we also wanted to make this watch as beautiful as possible, to make it an absolute pleasure to behold.
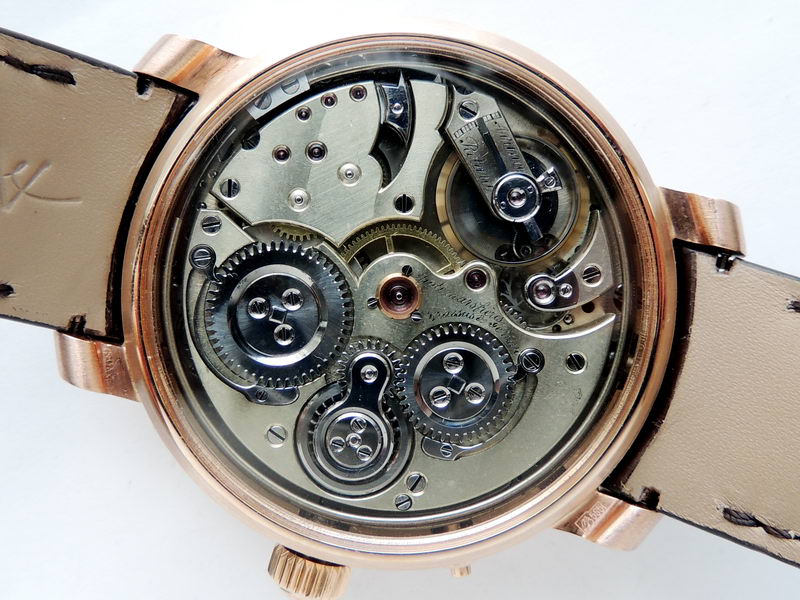
This movement is very unique, due to a function called the Petite Sonnerie. It is not a classic repeater, but an automatic one with self-striking chimes. The other rare feature is a triple-gong movement with three hammers, instead of the typical dual-gong – a feature referred to as a carillon.
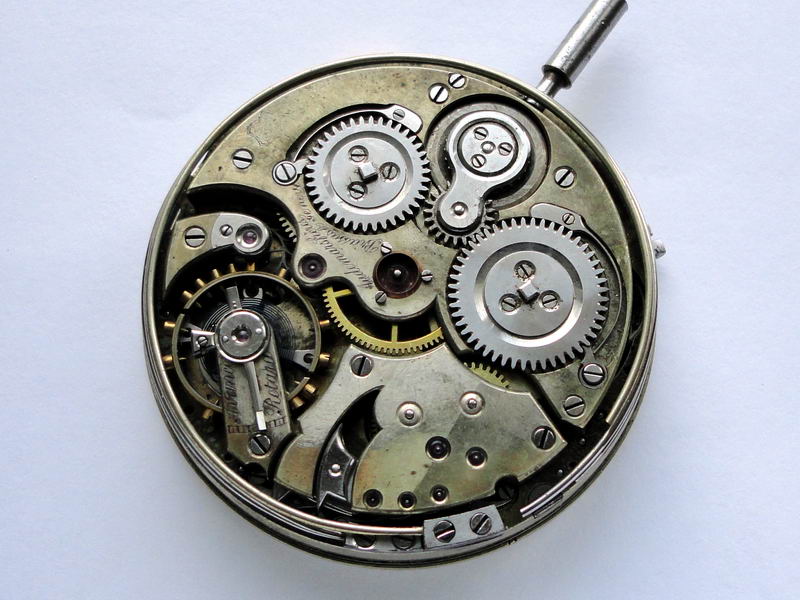
The mechanism has two barrels, one for the movement and one for the gongs. The movement is wound up by one crown, which is spun both ways: clockwise winds up the running movement, and anticlockwise winds up the chimes.
The triple-gongs have three different hammers, each of which have a different sound tone!
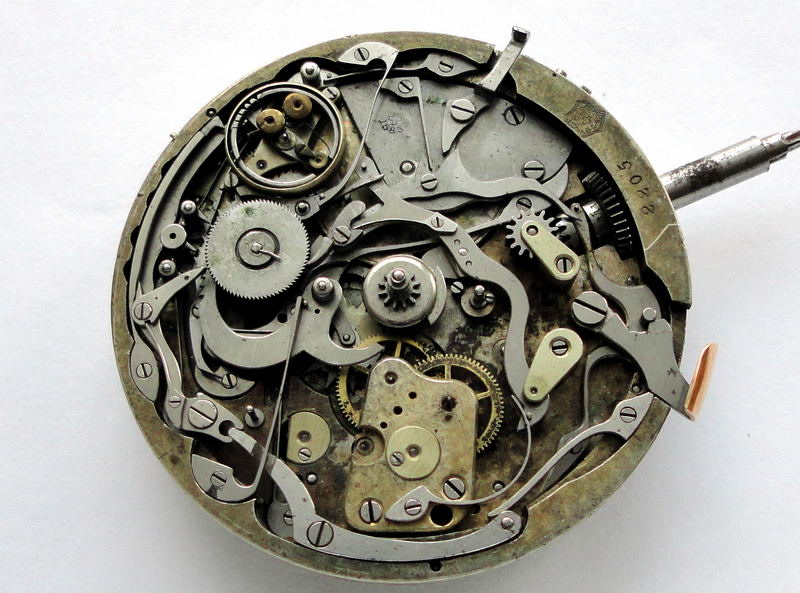
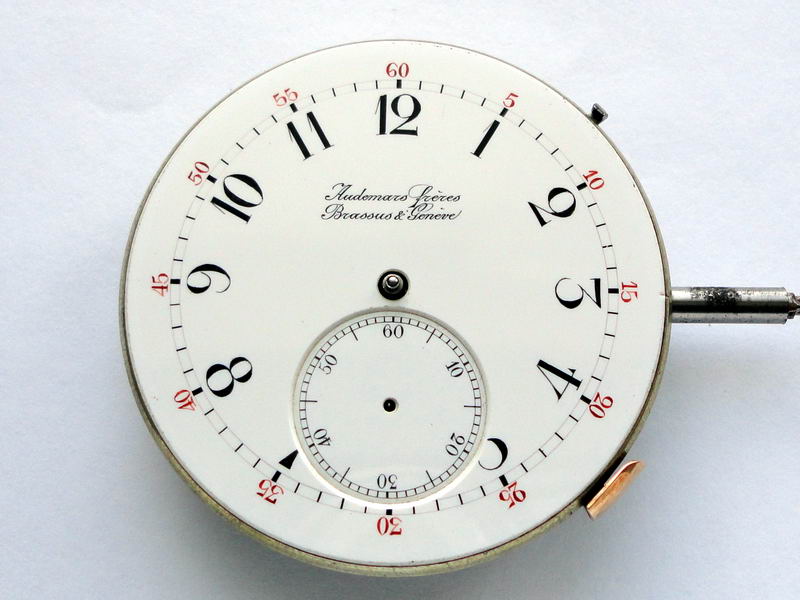
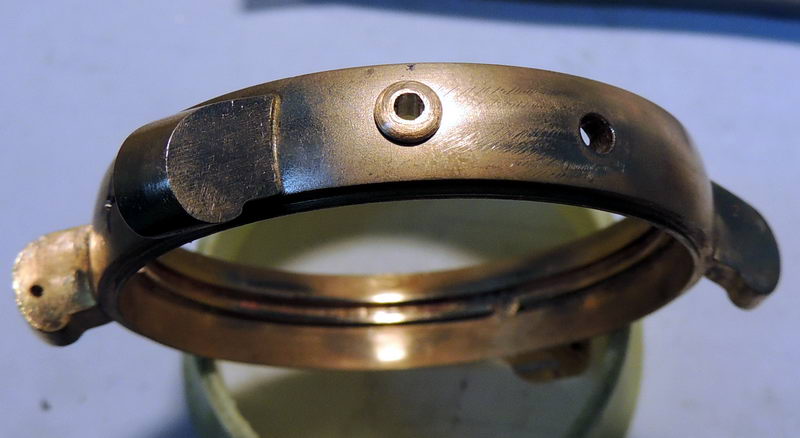
Under the dial is a system of springs, levers, racks and cams, which creates the sequence of hammer strikes to gongs. There is a switch lever outside to turn the chimes action off (top) and also one for setting the time (right). The movement dates back to 1880 – 1900 and was ‘high-tech’ for its time. It still really is a pure technological wonder.
The company Audemars Freres was one of the many branches of Louis Audemars’ watch dynasty. Audemars Piguet is the other famous branch, which still continues to thrive on the world’s horological stage. It is clear that, at the time that this movement was made, there were no wristwatches, and so it was set in a gold pocket watch case. Now though, it is time to house this movement into a wristwatch case that will continue to showcase its beauty and complexity.
Design Inspiration
As the main theme for the case design, we chose the Audemars Piguet model ‘Jules Audemars Grande Sonnerie Carillon’, a rare and expensive piece made in 2002. As it has similar functions to this movement, such as the quad-gong and a carillon, it was a perfect match.
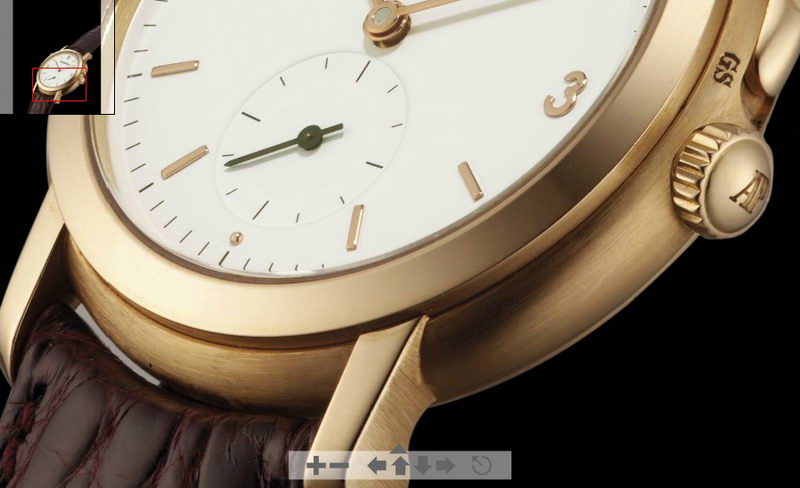
Our inspiration came from this gorgeous case design.
The diameter of the movement (by the dial) is 46.5 mm with a thickness of about 14 mm. These sizes do create some restrictions, as we want a case that isn’t too big. It needs to look ergonomic and yet still harmonic. The size of a modern movement from Audemars Piguet is a little different: thinner, with a more elegant look and a flat, thin bezel.
If we were to simply increase the size of the piece proportionally, we would end up with a very large watch that would very likely be rather uncomfortable to wear. The most difficult task will be to ‘hide’ the thickness of the case, in order to prevent the watch from feeling too large on the wrist. We could go the easy way out (horrible example 1, horrible example 2, viewer discretion is advised :P), but it looks too bad to bear, and wearing such a thing may make you feel ashamed.
First of all, we created a 3D sketch of the case, keeping in mind the size of the movement we are dealing with. The watch will be thick, and this thickness will extend to both the front and back bezels. We managed to fit around 2 mm of extra thickness in each bezel, and were left with 10 mm in the centre – a very acceptable size, all in all.

The central part of the case body. The rectangular openings are for the lugs, the round holes are for the winding crown and levers/knobs.
After adding the lugs and bezels, we need to take a look at the general proportions of the case. The thickness is a bit overwhelming at the top and bottom bezels, so we will accommodate this by making the central part thinner.

Finally, after a lot of adjustments, we create the blueprint for the router.
The large feature of this case is where the main toroid ‘donut’ part and the straight edges of the lugs come together. It is harder than it looks to make, as casting will not produce a nice edge, and routing it is impossible because the spindle will not reach into the corners. Eventually, we decided to go with a modular case – we will make the lugs separately from the main body and then solder them together later on.
Manufacturing the Case
Here, I should mention that some stages of the case production were not photographed. However, this is not necessarily a bad thing, as this part of the routing is really quite boring. So instead we will focus on the features of the case.
First, we need to make metal castings. This is a very important step, and so we asked a specialist caster to create it for us. The complex bit of this process is that he needs to make the metal very dense, without any pockets of air, bubbles, internal cavities, or dirt/oxides. If, during the routing we encounter any internal bubbles, pockets or holes, then the whole effort will have been for nothing and we’ll have to start over again.
Because of the importance of solid casting, we cancel out any thin walls, as only thick parts and pieces will come out properly. The case weighs in at 70 grams, even though we used 250 – 300 grams of gold during the casting. The leftovers are returned as ‘sawdust’ and used in other parts later on: the caps, knobs, and crown.
Because of the large tolerance margin of casting, extra material was used, and the casting totalled 3 – 5 times the gold of the finished pieces.
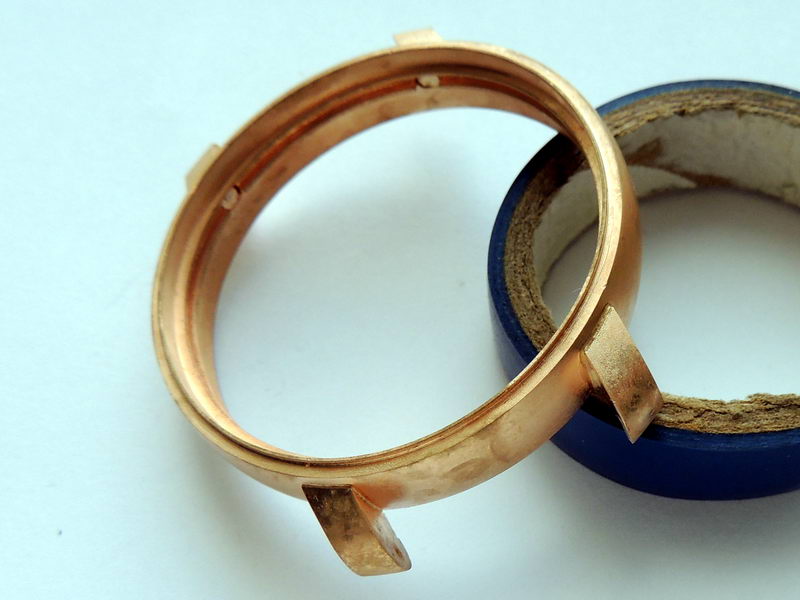
The lugs are a separate cast, and are to be soldered onto the case later on. Their wax cast is based on a 3D model, printed on a special wax 3D printer.
Finishing
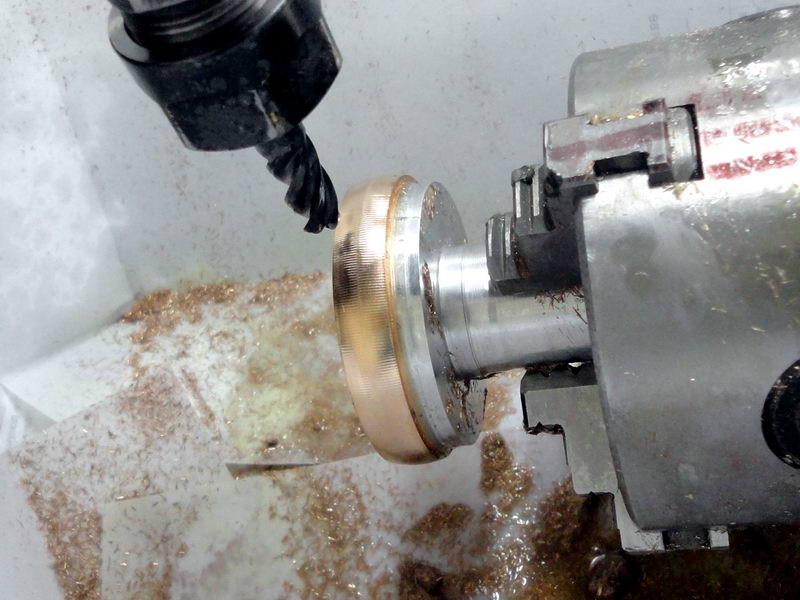
The first thing to be used here is the router: it creates the initial interior and exterior forms. The interior surface is cylindrical, in order to allow us to hold it in a precision collet, which will let us route the outside shape.
Next is the really interesting stuff. We need to turn the cylinder into a torus. We will route the outside shape of the ‘donut’ on a 4-axis CAM, going back and forth with a round-tipped drill bit, until the form is right.
The drill bit mills away the metal, leaving behind the desired shape.
The first round is done. We will then rotate it by 0.5 degrees, and do another round.
The sawdust is all collected on a piece of paper.
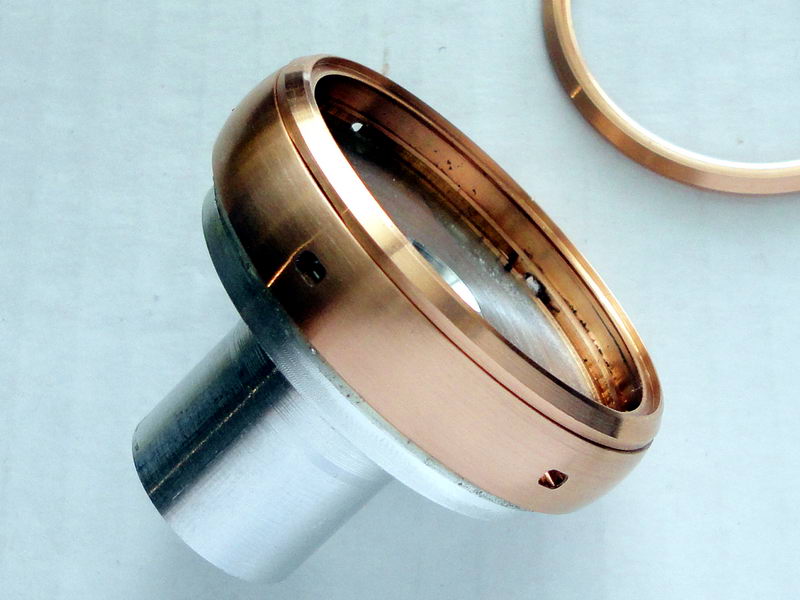
The surface gets a finishing touch with an abrasive tool for polishing metals, soon the surface turns into a shiny pink gold toroid.
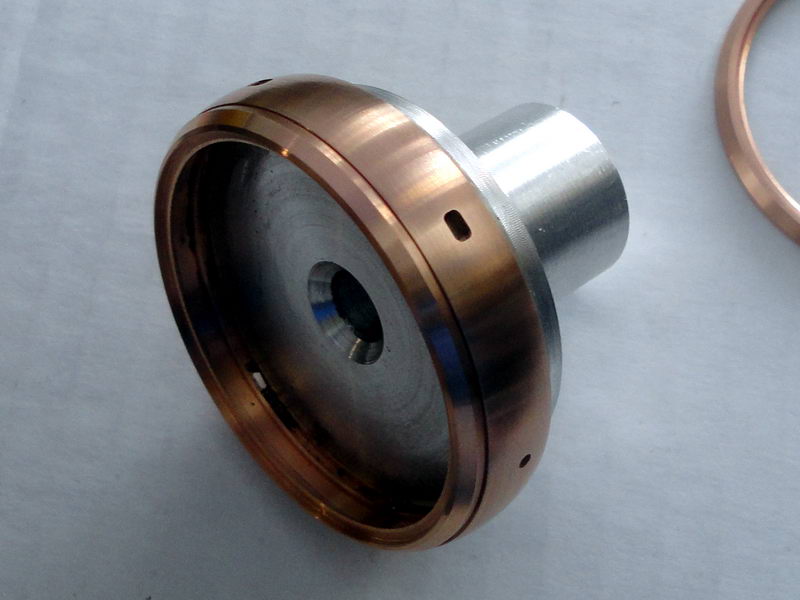
We route out rectangular holes in order to affix the lugs to the piece, and round apertures for the knobs and the crown. Now is a good time to test-fit the bezels, to see how they fit and if anything needs adjusting.
Assembly
The next stage of the process is to solder the different parts onto each other. This is really the work of a jeweller, but the only support we got was when we needed to fit the lugs exactly 24 mm apart. Each knob, lever and button look natural on the watch, yet each of these parts must be individually routed, brought to size, and then soldered with a special gold solder.

The first join, before the final internal brazing.
All of the satin is gone after the part was heated, the surfaces are smoothed down.
The lugs are not soldered inside yet.
We then cast blanks from the leftovers, and route the button cups. Then they need to be adjusted to fit, and finally affixed on the case.
The winding crown did not come out well the first try, it just resembled a radio adjustment knob. We had to get a working form, which wasn’t easy.
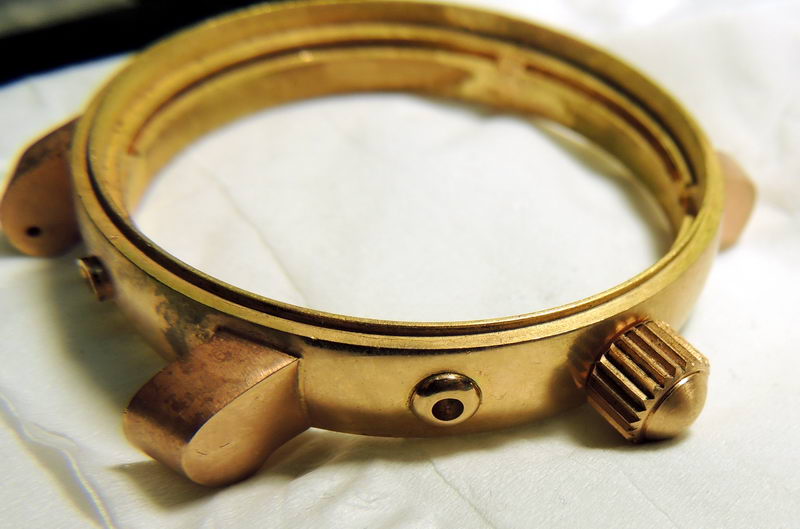
The knobs, lugs and the crown are complete. The case resembles a finished unit even more.
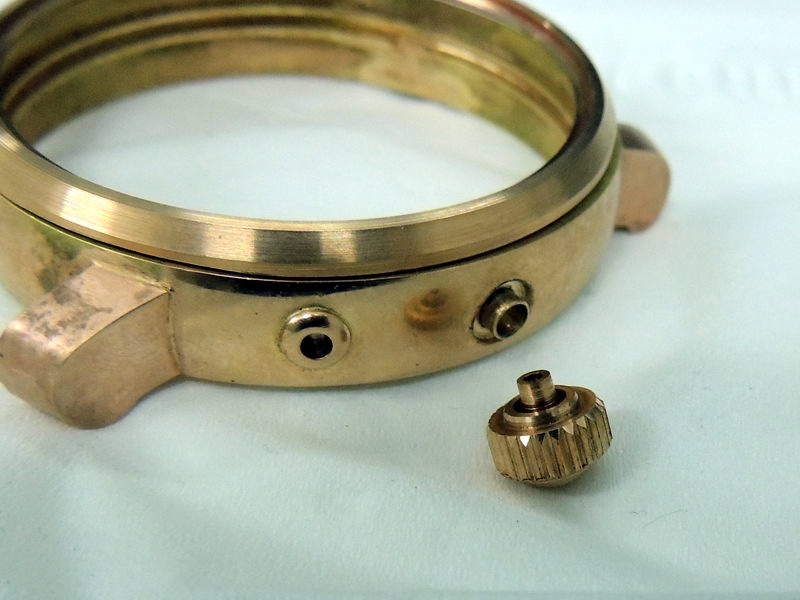
We will make a footer under the crown, as this will prevent dust from entering the movement.
Polishing and Finishing Touches
After assembling and soldering together the parts, there comes the tedious and difficult task of finishing the look. At this point we had cycled through many bad ideas, none of which looked good (no photos, sorry). Finally, we settled on a hybrid satin finish.
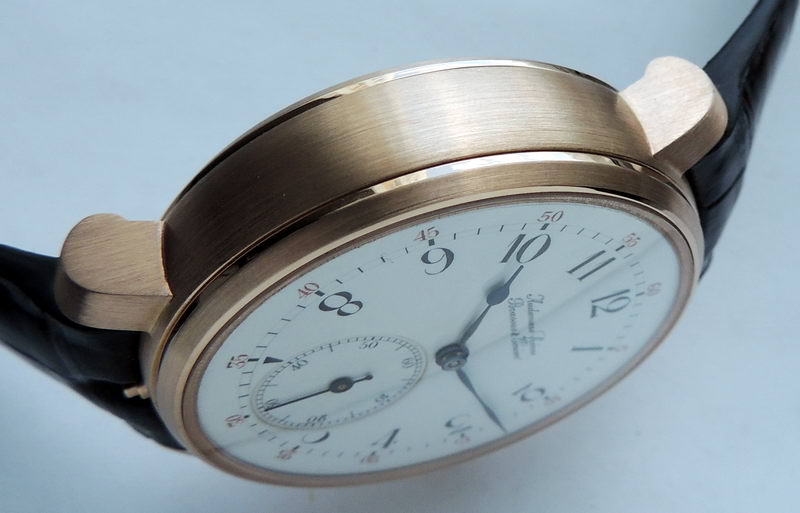
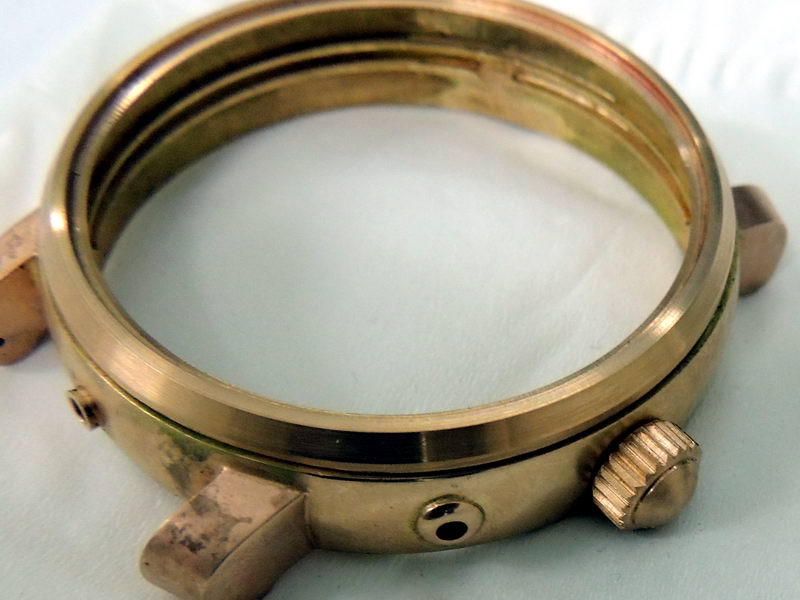
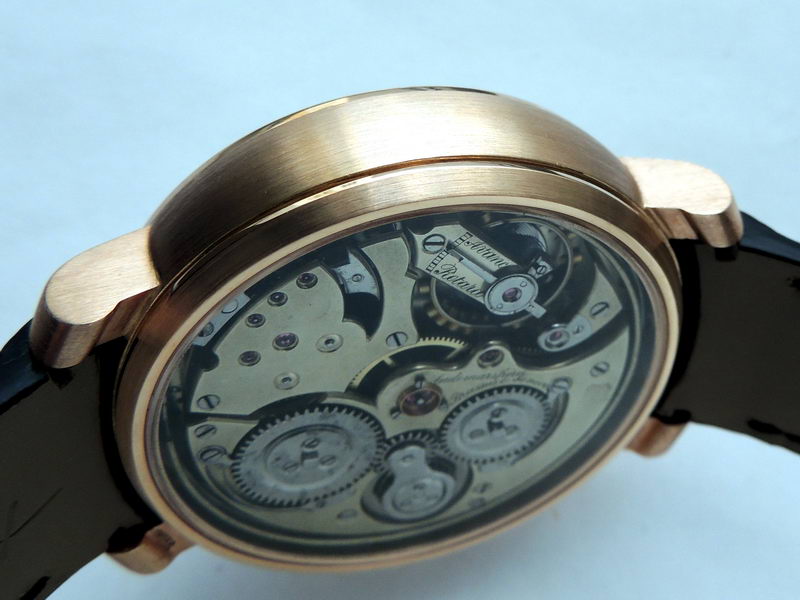
The satin along the sides was achieved using an abrasive steel sponge, it is combined with smooth edges of the bezels.
The central part is perceived as the thickness of the watch, and the shiny bezels as the edges with mirror chamfers.
Horizontal lines create the feel of a thinner watch than is actually the case.
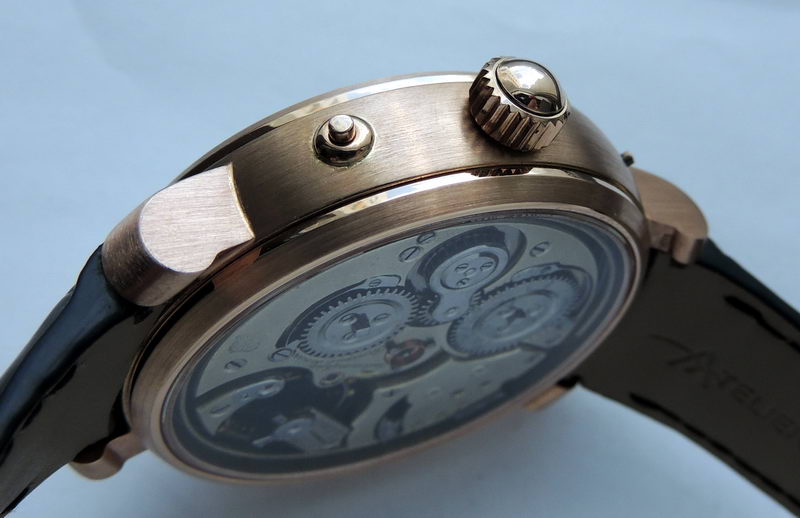
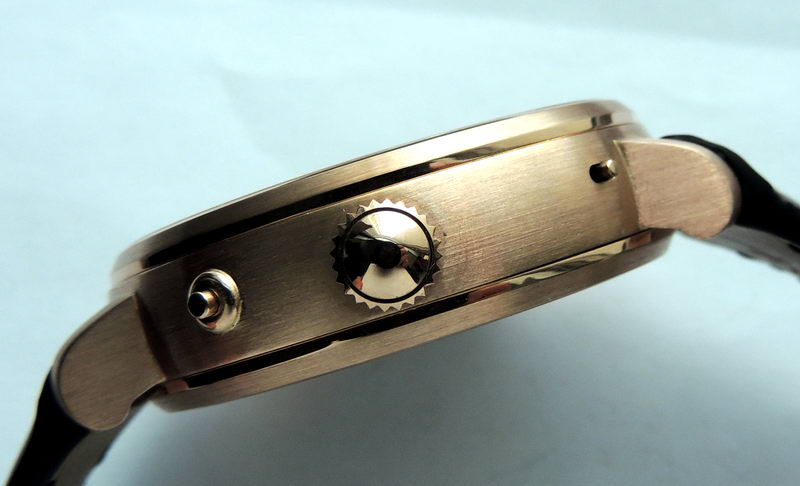
From left to right (above): the time setting knob, winding wheel, and gong switch. The gong switch was chosen to be minimalistic (like on an iPhone), and done this way so as not to overwhelm the design.
The satin polishing touches have also been applied to the outside of the bezels, as they will rub against various surface when the watch is worn. Minor hits and constant wear will show on a shiny surface, but will not ruin the linear pattern.
A Little Bit About the Movement
The movement was initially dirty, but this was soon remedied, and now the surfaces visibly gleam in the light.
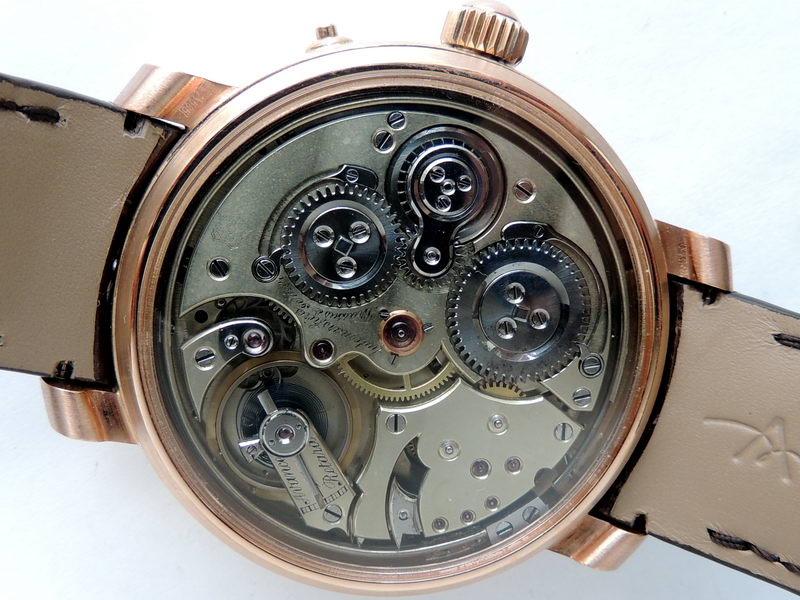
The movement was all but untouched, except for two missing wheels.
After servicing and more fine adjustments, the movement has the precision of a new one.

In total, 12 different people worked on this project, including casters, jewellers, glazers, and others.
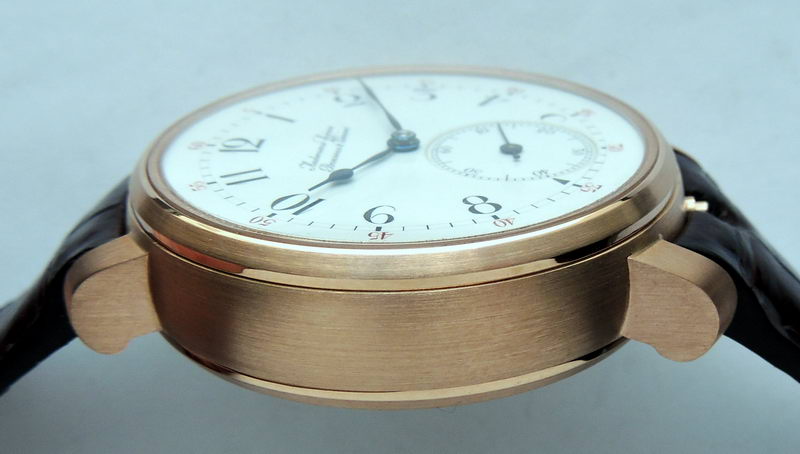
Here is a good picture of the final result. The button at numeral 6 is responsible for the manual gong, which works as a quarter-repeater. Other niche features include sapphire crystal and a hand-crafted custom crocodile leather strap.
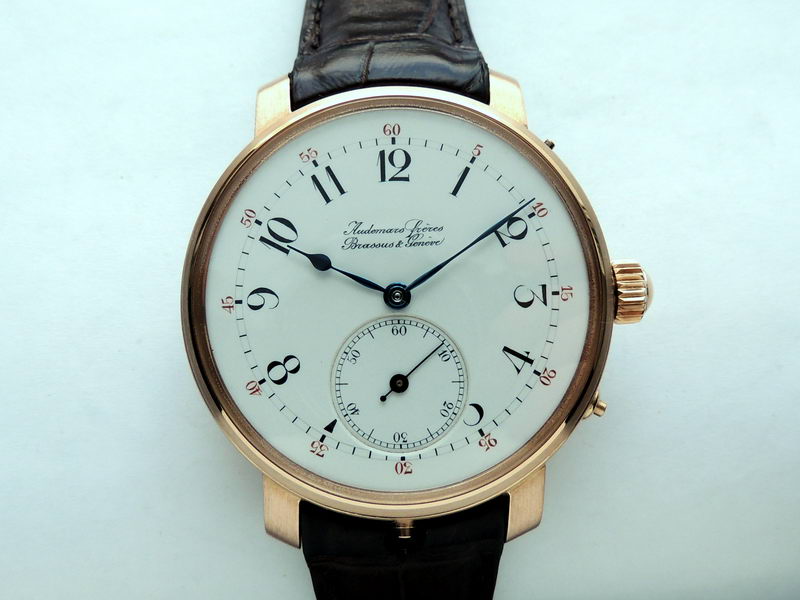
We would like to thank the watchmakers at Audemars Freres, whose efforts lived longer than their creators. A beautiful movement was not lost, and once again delights its owner with its excellent precision and clear, beautiful sound.
Thank you for your attention!
