

Foot Soldering Technique Using Rose’s Metal
Let’s take a look at a simple and useful technique for repairing broken dial feet. A known method for repairing broken feet that is used by some watchmakers, is to stick it with a piece of double-sided tape. However, this is a bad method that I do not recommend (except when you was asked for quick and cheap repair). Soldering the feet back on is much more practical!
For this case we will be using Rose’s metal, an alloy with a low melting point of only 94 degrees (25% Tin, 25% Lead, 50% Bismuth). Such a low temperature guarantees that the enamel will be safe during the process.
This method is based around heating the dial plate, and so it can only be used for older enamel (ceramic) dials. Modern, varnish/lacquer watch faces can easily be damaged if heated.
Step 1: The photo shows a broken dial foot, a very common problem.
To begin with, a cross is drawn with a marker to help us get the original foot position, before starting the process of taking the original solder off.
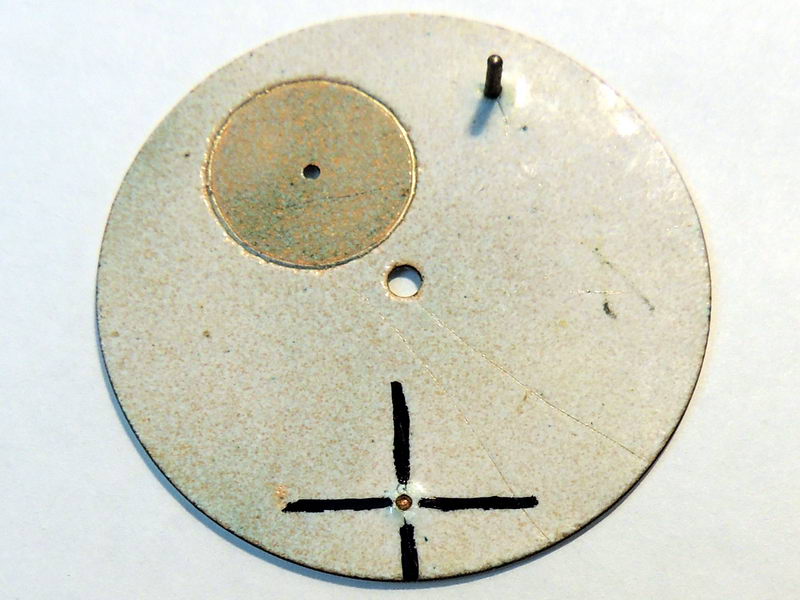
The enamel dial foot is broken.
Using a drill and a thin diamond disc, we take off the counter-enamel from the copper underside. Adding water helps cool it down, and we must make sure not to press too hard. The vibration of the disc can be dangerous for the enamel, as this could crack it. Use a precisely centred disc, as thin and soft as possible.
There is a leak of counter-enamel around the foot, which will take some time to take off. This is very normal at the current stage in the process, and should not be hurried, so as to avoid damaging it.
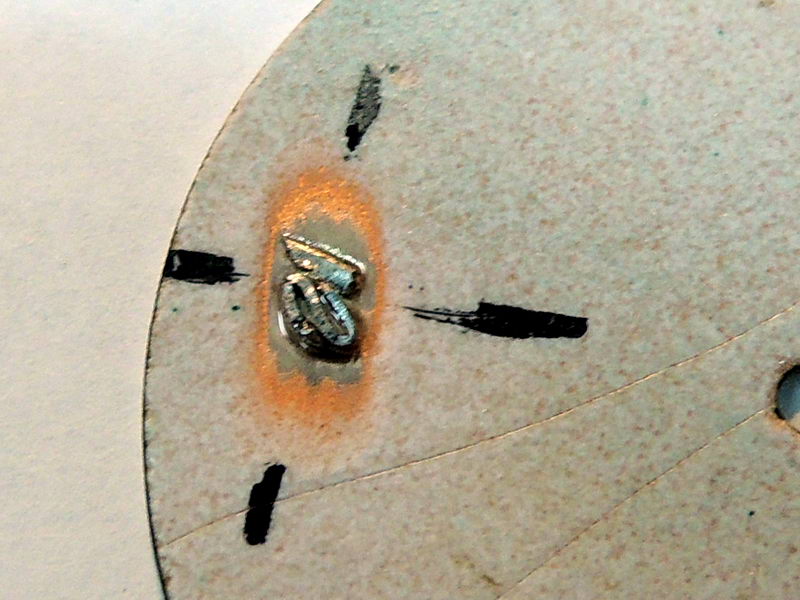
Step 2: After cleaning a 3×3 mm space with the diamond disc, a drop of soldering acid and some Rose’s metal is applied there.
The process of soldering the enamel dial.
Next, the plate is heated thoroughly and evenly, until the alloy is melted by the heat. The alloy does not need to catch fire, it will soon naturally melt into a small drop that will not spread; although we will still need a larger surface area.
Step 3: The alloy is stuck to the plate and needs to be spread around.

If the heating results in a round drop with shiny sides, it could easily fall off the dial, and it is important to ensure that it is spread around to avoid this.
Step 4: We now take a brass rod of the correct thickness for our purpose, pre-tin it, and bend it as shown in the photo below.
Holding onto the longer part of the rod, we push another stick against where the original foot stood (here, we will need the cross that we drew earlier).
The rod is to be soldered using a thin soldering iron. It is very important that the rod is right in the centre of the cross and placed perpendicular to the dial, otherwise the watch face and the second dial will shift, which will jam the second dial shaft.
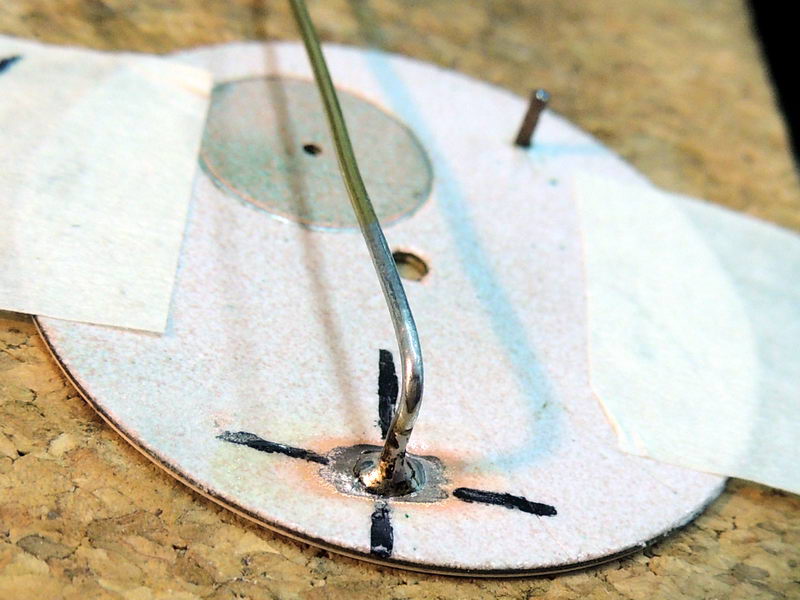
Repairing the enamel dial foot.
The watch face is stuck to a cork base (although wood would also work) using paper tape.
Step 5: Using pliers, the soldered foot is cut to the required length.

The foot must not be bent!
If the foot needs to be moved or rotated, steps 4 to 5 must be repeated. The foot must not be bent, as the contact area is fairly large, the soldering is strong, and there isn’t any protection for the counter-enamel. Bending the foot would move the front plate causing cracks to appear on the front, even pieces of enamel could fall off.
Step 6: The front of the dial is still perfect – the low temperature has not damaged it at all.
It should be noted again that this method should not be used for lacquer painted dials, as they are easily damaged by heat.

If the enamel has tiny micro-cracks or spider web cracks, they will get bigger or will darken during step 2.
Step 7: A thin file is used to cut under the watch dial screw.

Usually the newly soldered feet has a drop of solder around it. This drop can easily be removed using a scalpel.
If you plan to perform this method of repairing a broken dial foot, I strongly recommend practicing on some scrap, unimportant dials first. When the technique is mastered, the whole operation will take at most about 30 minutes.